File Menu Bar
From CockosWiki
| Line 102: | Line 102: | ||
[[Image:Cleanup.png]] | [[Image:Cleanup.png]] | ||
| + | |||
| + | |||
| + | == Quit == | ||
| + | |||
| + | Exits REAPER | ||
*Back to: [[Menu_Bar_Options/Commands | Menu Bar Options]] | *Back to: [[Menu_Bar_Options/Commands | Menu Bar Options]] | ||
Revision as of 16:29, 13 February 2007
Main Page > Reaper Documentation > Menu Options/Commands
Contents |
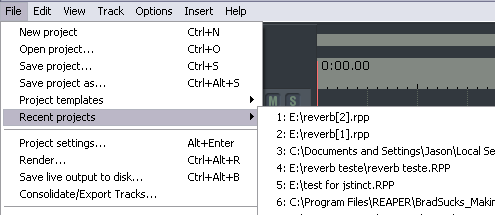
New Project
Creates a new REAPER project. Depending on how you have Preferences configured, you may be prompted to choose a project name. New projects are based on a template. You can modify the template to include tracks, routing, and effects.
Open Project
Open a navagation window allowing you to choose an existing REAPER project. The following filetypes are supported:
- REAPER project files (*.RPP): This is Reaper's standard project filetype
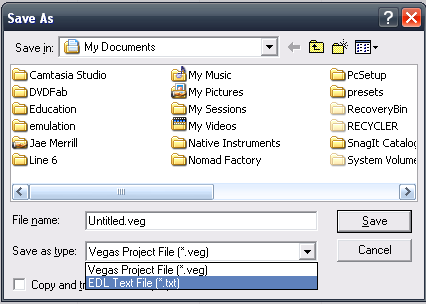
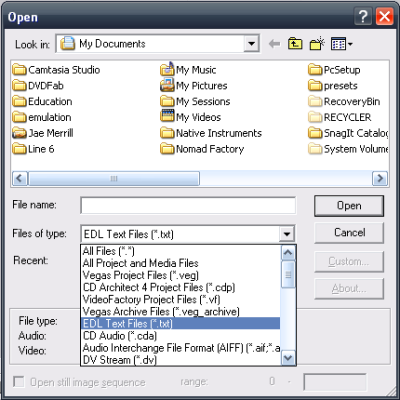
- EDL TXT (Vegas) (*.TXT): This open's EDL files that were saved with Vegas AS an *.edl. The offset, volume, pan, and fades are preserved. Here's how to save as EDL in vegas:
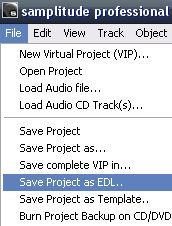
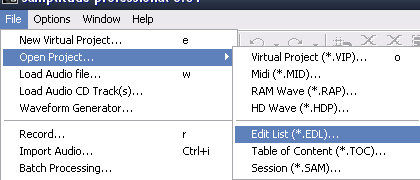
- EDL Samplitude (*.EDL): This is the EDL format that Samplitude saves if you select "save as EDL". The offset, volume, pan, and fades are preserved. Here is the command that saves as EDL in samplitude:
- NINJAM logfile (*.clipsort.log):
Save Project
Saves and overwrites the current project.
Save Project as...
Saves project as another filename or format.
- Reaper project files (*.RPP): Reaper's standard project format.
- EDL TXT (Vegas) (*.TXT): Saves as a Vegas-compatible "EDL" file. You can open EDL files in Vegas here:
- EDL (Samplitude) (*.EDL): Saves as a Samplitude-compatible "EDL" file. You can open EDL files in Samplitude here:
- Create Subdirectory for Project: If you select this option, a subdirectory will be created (under the directory the explorer is currently in) with the same name as the project file, and the project file will be saved under that folder.
- Copy all Media into Project Directory: This makes copies of all the media in your project into the project directory.
- Trim Media: If you split media and cut off ends of media, or changed the start times of certain media, this command will destructively edit the media, thereby decreasing the file size.
- Move all Media into Project Directory: This option will remove all the media from its original directory(ies) and place them in the project directory. This can be a great way to organize your projects that could have files spread all over your hard drive(s).
Project Templates
This reveals a list of previously saved project templates.
- Save Project as Template: This saves the current project AS a template. Templates include routing, effects, and even wave files.
Recent Projects
Lists the recently opened Projects, up to the limit set in General Preferences (default is 50).
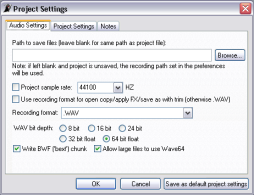
Project Settings
This takes you to the Project Settings window.
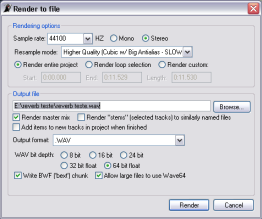
Render
Opens the Render dialog, and allows you to process your project (including effects, envelopes, routing, etc.) into a single file.
Save Live Output to Disk
Opens a window prompting for a filename. When selected, starts saving the live output of REAPER to the selected file. The file format is set in the Audio > Playback Preferences (default is 24 bit WAV).
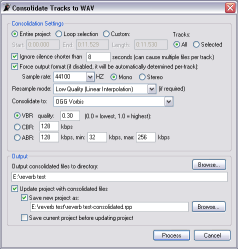
Consolidate/Export Tracks
Opens the Consolidate dialog.
Spawn New Instance
This opens a new instance of REAPER.
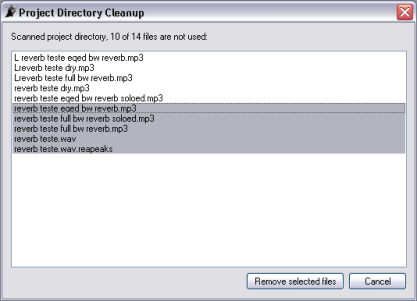
Clean Current Project Directory
This scans the current project directory, and displays all of the files that arent being actively used in that project. You are given the option to permanently delete those files, all or some of them.
Quit
Exits REAPER
- Back to: Menu Bar Options
