File Menu Bar
From CockosWiki
Main Page > REAPER Documentation > Menus
This page needs updating.
Please update the page (How to edit a page?)
If you have updated the page, or examined it and found the information up-to-date, please remove this box.
Contents |
New Project
Creates a new REAPER project. Depending on how you have Preferences configured, you may be prompted to choose a project name. New projects may be based on a template. You can modify the template to include tracks, routing, and effects.
Open Project
Open a navigation window allowing you to choose an existing REAPER project. The following file types are supported:
- REAPER project files (*.RPP): This is Reaper's standard project file type
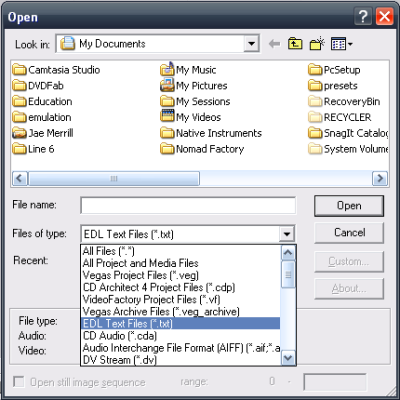
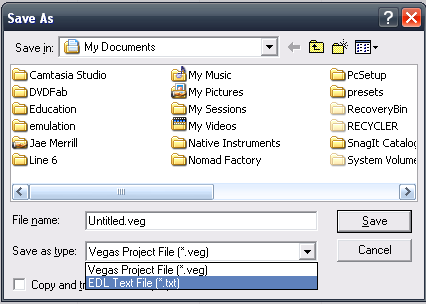
- EDL TXT (Vegas) (*.TXT): This open's EDL files that were saved with Vegas AS an *.edl. The offset, volume, pan, and fades are preserved. Here's how to save as EDL in vegas:
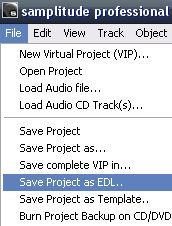
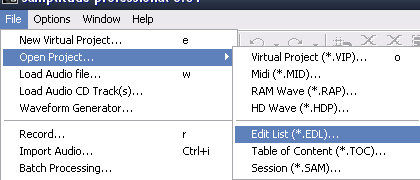
- EDL Samplitude (*.EDL): This is the EDL format that Samplitude saves if you select "save as EDL". The offset, volume, pan, and fades are preserved. Here is the command that saves as EDL in samplitude:
- NINJAM logfile (*.clipsort.log):
Click Here for more information
Save Project
Saves the current project and overwrites the previous one with current changes. You may want to use this when you are sure you have a pristine point to save and know you do not want to go back.
Save Project as...
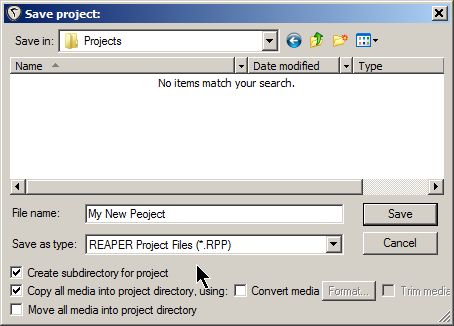
This is what the Save Project As... dialog looks like.
- Create subdirectory for project: If you select this option, a subdirectory will be created (under the directory the explorer is currently in) with the same name as the project file, and the project file will be saved in that folder.
- Copy all media into project directory: This makes copies of all the media in your project into the project directory. You may wish to use this if you, for instance, construct a project from media items, samples or loops from different parts of you hard drive. This keeps a full copy of all you are using in this project and saves you from accidentally deleting a useful bit of that project if you delete some of your samples or loops etc.
- Convert media: You can choose to convert the copied media into the Reaper native format (wav, FLAC, mp3 etc) as it is copied. This could be a useful space saver, for instance, FLAC is roughly half the size of wav, with no loss of quality.
- Trim media: If you split media and cut off ends of media, or changed the start, ot end, times of certain media, this command will destructively edit the media, thereby decreasing the file size. Normally Reaper is non-destructive so use this only if you wish your trims or edits to be permanent.
- Move all media into project directory: This option will remove all the media from its original directory(ies) and place them in the project directory. This can be a great way to organize your projects that could have files spread all over your hard drive(s).
When creating a new project you typically Create subdirectory for project and Copy all media into project directory. This ensures that all the audio and *.MID files are stored in the project folder. Note that Move all media into project directory removes the files from their current location, so that if you have files shared with other projects (such as samples) the other projects will no longer see those files; be careful.
Saves project as another filename or format.
- Reaper project files (*.RPP): Reaper's standard project format.
- EDL TXT (Vegas) (*.TXT): Saves as a Vegas-compatible "EDL" file. You can open EDL files in Vegas here:
- EDL (Samplitude) (*.EDL): Saves as a Samplitude-compatible "EDL" file. You can open EDL files in Samplitude here:
Project Templates
This reveals a list of previously saved project templates.
- Save Project as Template: This saves the current project AS a template. Templates may include routing, track templates, effects, and even wave files.
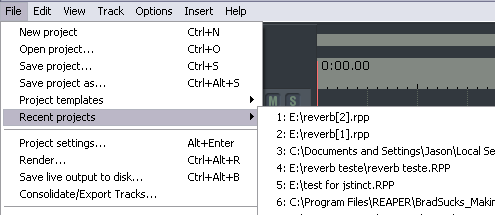
Recent Projects
Lists the recently opened Projects, up to the limit set in General Preferences (default is 50).
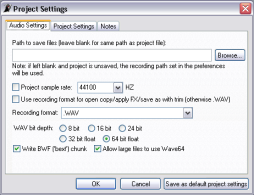
Project Settings
This takes you to the Project Settings window.
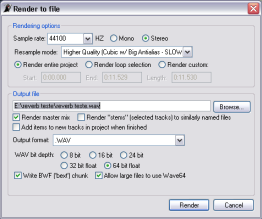
Render
Opens the Render dialog, and allows you to process your project (including the results of effects, envelopes, routing, etc.) into a single file.
Save Live Output to Disk
Opens a window prompting for a filename. When selected it starts saving the live output of REAPER to the selected file. The file format is set in the Audio > Playback Preferences (default is 24 bit WAV). This is very handy for live recording. If there is a power outage or neutron attack or some calamity then this will mean you will have saved everything up to the point of calamity. You may be gone but your music lives forever.
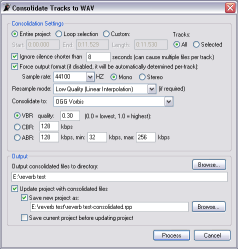
Consolidate/Export Tracks
Opens the Consolidate dialog.
Spawn New Instance
This opens a new instance of REAPER.
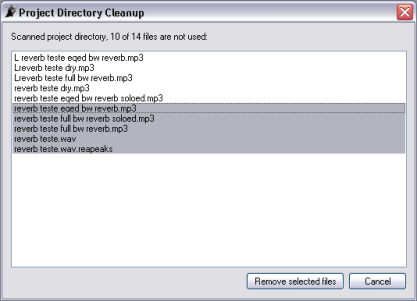
Clean Current Project Directory
This scans the current project directory, and displays all of the files that aren't being actively used in that project. You are given the option to permanently delete those files, all or some of them.
Quit
Exits REAPER
Main Page > REAPER Documentation > Menus
