Render
From CockosWiki
Main Page > REAPER Documentation
This page needs updating.
Please update the page (How to edit a page?)
If you have updated the page, or examined it and found the information up-to-date, please remove this box.
Contents |
About
This is basically for exporting audio from your project
For Rendering as Track-freezing see: Rendering (freezing)
Rendering Options
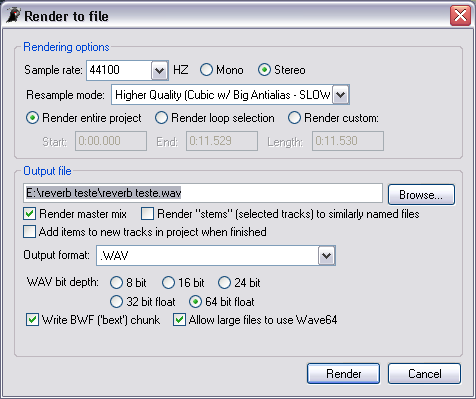
The Render dialog is used for rendering a file from your project. You can also use it to burn a CD containing a mix of your project.
The Render dialog is accessible from the File menu bar or the Ctrl+Alt+R keyboard shortcut.
Sample Rate
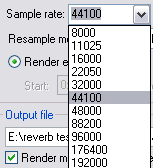
Select this check box to enable the sample rate to be used for the render. Select the sample rate from the drop-down box by scrolling and clicking on the sample rate you wish to use:
You can also choose to render the file in mono or stereo.
Limit to 1x realtime
Set this check box if you need to limit the speed at which REAPER does the rendering to the normal play speed of the project. I don't know why you'd need to do this...
Resample Mode
This option sets the render sample rate conversion method that is used for files that do not match the rendering sample rate, or when there is project playspeed automation. By default, REAPER uses the highest quality mode. Three other render settings are available from the drop-down list:
Render resample mode does not affect files that are at the same sample rate as the render, unless their playback speed has been altered.
Render Length
Render Entire Project
This option will render the entire project from beginning to the end of the last media event.
Render Loop Selection
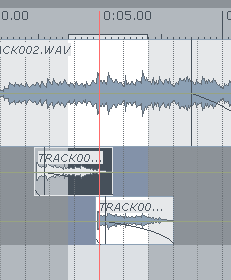
This will render only the loop selection of a song:
You will also see the time selection of your render change if you select this option:
Render Custom
This will allow you to manually enter the time selection for rendering:
Output File
Here you can choose the directory and filename for saving the rendered file.
Track Render Options
Render Master Mix
This will render all tracks and their routing.
Render Stems (selected tracks) to Similarly Named Files
This will only render the tracks you have selected.
See also: Render track as stem, actions for "freezing" tracks.
Add Items to New Tracks in Project when Finished
This will add the tracks back into the project (helpful for REAPER's "pseudo-freeze")
Output Format
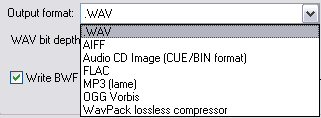
By default, REAPER records to WAV format at a sample rate of 44.1kHz and a bit depth of 24 bits. The Recording Format drop-down box allows you to select the following alternative recording formats:
Currently supported Recording Formats:
- WAV - 16, 24, or 32 bit floating point
- AIFF - 16, 24 or 32 bit
- FLAC - 16 bps - 0-8 Quality
- MP3 - CBR, VBR default, VBR old, VBR new, VBR mtrh or ABR Modes - Stereo, Joint Stereo, Multi-Channel or Mono - 8 - 320 Constant Bitrate - 13 Quality options
- OGG Vorbis - VBR, CBR or ABR - Variable Quality and Bitrate options
- WavPack - WavPack is a lossless compression format and provides a very good compression/performance ratio - 16, 24, 32 and 32 bps float bit depths - Variable Modes
- Audio CD Image (CUE/BIN format) - Generates a CD image and optionally allows CD burning of the generated image
- Soundcloud, see http://stash.reaper.fm/v/8885/reaper_soundcloud.zip
WAV Bit Depth
Here you can choose the bit depth for the render to be in.
Write "BWF" (text) chunk
This enables a text chunk in the wave file which is compatible with the "Broadcast Wave Format" or "BWF", that allows it to remember its offset and place in a project. BWF format @ wikipedia
Allow Large Files to use Wave64
This enables usage for the "wave 64" format (wave 64 info here) which, among other things, allows for higher filesizes (+4GB) than conventional wave formats.
Main Page > REAPER Documentation


