How to set up multi-band effects
From CockosWiki
Multi-band effects via routing to seperate tracks
First add 3 tracks. In this tutorial we will name them "Low" (Track 1), "Mid" (Track 2) and "High" (Track 3), because this will be the bands that will be routed to them later.
After that put your media item(s) you want to process the FX on in track 1. It will then be split in to the low, mid and high band among the 3 tracks.
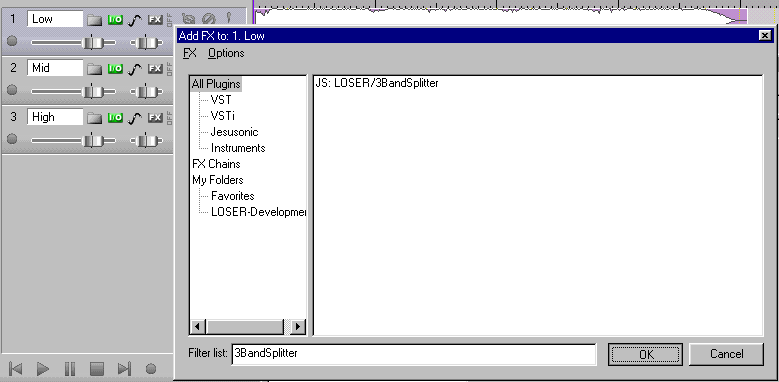
Then add the Jesusonic effect "3BandSplitter" to track 1 ("Low") (cf. picture).
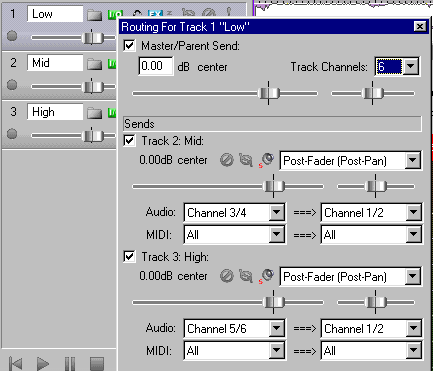
The next step is to make the 1st track use 6 channels (by clicking it's 'I/O' button), and set sends from 'track 1 - channel 3/4' ===> 'track 2 - channel 1/2 and 'track 1 - channel 5/6' ===> 'track 3 - channel 1/2' (cf. picture).
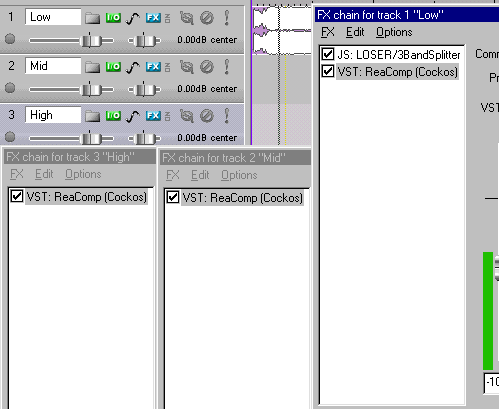
Now you can add FX to each track and those FX will only apply to the specific band (cf picture).
Last but not least solo each track and adjust the frequencies in the '3BandSplitter' to fit your needs.
The REAPER project file: Media:SetUpMultiBand.RPP


