ReaEQ
From CockosWiki
Main Page > REAPER Documentation > Effects In REAPER > Effects
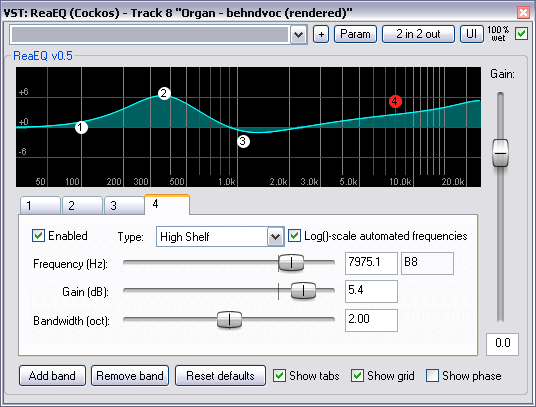
ReaEQ is a multi-band equalizer plug-in. By default there are four bands but bands can be added or removed as you wish.
A band is really a point on the graph made up of a frequency and a volume. Move the point up to increase the gain of that frequency in the output signal, move it down to decrease it. Move it left and right to set the frequency.
Controls
Common Controls
Move a fader to set a value or, to set a value precisely, type directly into the input box if it is not "greyed-out". Double Click a fader to return to its default value.
"Fine-tune" a value controlled by a fader by holding the Ctrl key while moving the fader.
- Drop-down list -
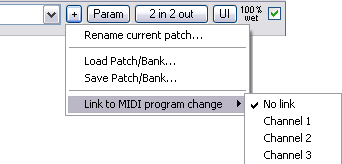
- + - Patch and Patch/MIDI program change link management, displays a graphic similar to this:
- Param
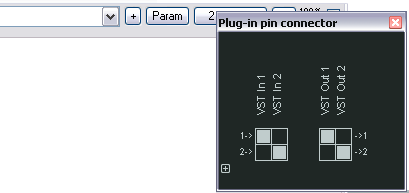
- 2 in 2 out - Routing. The plugin pin connector, displays a graphic similar to this:

- UI - Toggle between default and custom User Interface
- 100% Wet - The plugin is bypassed when this is checked
Plugin Specific Controls
You can click on any point on the graph and move it to the desired frequency/gain combination.
It is also possible to change only one parameter using these points on the graph.
- Gain
- CTRL + Left-Click
- Frequency
- ALT + Left-Click
- Bandwidth (or Q)
- SHIFT + Left-Click
It is also possible to :
- Display a context menu where you can add a new point, delete, enable, disable or reset the selected point
- Right-Click
- Enable/disable the selected point
- Double Left-Click
You can also use the mouse wheel to change the bandwidth of the point under the cursor.
- Clicking on any tab will select that point. From there you can use a slider to set its value
- Enabled - Enables or disables the band
- Type - There are different filter modes for each band:
- Low Shelf -
- High Shelf -
- Band - (the default, oh, and the easiest)
- Lowpass:# - Cuts any frequency above the set value
- Hipass - Cuts any frequency below the set value
- Allpass - Changes the phase response of the set frequency
- Notch - Cut the set frequency
- Bandpass - Cuts everything but the set frequency
- Band (deprecated) - don't use this one for new stuff, it's here for compatibility with older versions of ReaEQ
- Log()-scale automated frequencies -
- Frequency (Hz) - The frequency for this band, the input boxes are in Hz and MIDI note name
- Gain (dB) - Gain for this band
- Bandwidth (oct) - Literally the width of this band, how "wide" (left & right on the graph) its effect is.
- Add band - This will add a new band to the graph
- Remove band - This will remove the current band
- Reset defaults - Sets values for the current band back to their default settings
- Show tabs - Shows controls for the tabs when checked, shows a larger graph when unchecked
- Show grid - Shows or hides the grid
- Show phase - Shows or hides the phase of the output signal (relative to the input signal)
- Gain (on the right) - Overall gain.
Main Page > REAPER Documentation > Effects In REAPER > Effects

